Category: lead

  • Commercial Real Estate and Environmental Testing: What Every Buyer Should Know

    Commercial Real Estate and Environmental Testing: What Every Buyer Should Know

    When it comes to commercial real estate, purchasing a property is about more than just price, location, and functionality. It’s also about minimizing risk—and that includes environmental risks. Many commercial properties, especially older buildings, may harbor environmental hazards like asbestosmold, and lead, among other contaminants. Failing to conduct proper environmental testing before closing a deal can lead to expensive surprises, health risks for occupants, and potential regulatory penalties. For buyers, understanding the scope and importance of environmental testing is crucial for safeguarding their investment.

    Why Environmental Testing is Critical

    When buying commercial real estate, you’re not just purchasing walls and land; you’re inheriting its history. Older properties, in particular, can carry several hidden environmental dangers. Here’s why conducting comprehensive environmental testing is non-negotiable:

    1. Health Risks
      Environmental hazards like asbestos, mold, and lead can pose severe health threats. For example, prolonged exposure to asbestos fibers can cause serious illnesses like mesothelioma, while mold exposure is linked to respiratory problems. Lead, particularly in paint or plumbing, can result in developmental issues, especially in children. These issues could make your property uninhabitable or require costly remediation.
    2. Liability Concerns
      Undiscovered hazards can expose you, as the property owner, to legal liability. If tenants, employees, or visitors are harmed by unsafe conditions, you could face lawsuits. Ensuring a clean bill of health for the property protects you from this kind of exposure.
    3. Regulatory Compliance
      Many states require property owners to address known environmental hazards in compliance with EPA and OSHA standards. Failure to test and identify these issues can result in fines and delays in property development or use.
    4. Preserving Property Value
      Properties with known environmental hazards often see reduced resale value. Identifying and addressing issues upfront protects your long-term investment.

    Common Environmental Hazards in Commercial Real Estate

    Understanding what you’re testing for is half the battle. Below are the primary hazards buyers should assess when considering a commercial property:

    • Asbestos
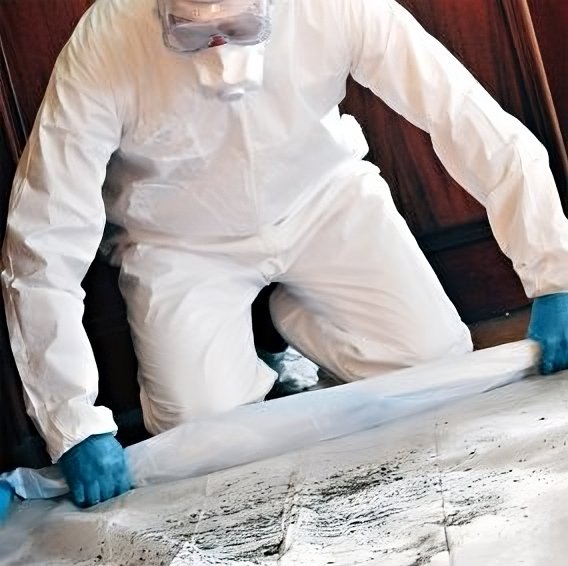
      Frequently found in insulation, roofing, floor tiles, and cement products in buildings built before the 1980s, asbestos becomes hazardous when disturbed during renovations or regular wear and tear.
    • Mold
      Mold thrives in areas with moisture issues like leaky pipes, poor ventilation, or flooding damage. It spreads quickly and can harm air quality, as well as structural integrity.
    • Lead
      Once a common ingredient in paint and plumbing systems, lead remains a significant concern in properties constructed before 1978. Over time, lead-based substances deteriorate, releasing particles harmful to humans and the environment.
    • Contaminated Soil or Groundwater
      Industrial properties and even some commercial sites may have residual contamination in the soil or underground water from previous chemical use, spills, or improper waste disposal.
    • Radon
      This naturally occurring, radioactive gas often accumulates in basements or lower levels of buildings. Radon exposure increases the risk of lung cancer and requires proper ventilation systems to mitigate its effects.

    Key Environmental Tests Before Closing

    To ensure a commercial property is free from environmental hazards, it’s important to conduct several critical tests. These assessments are typically performed by environmental professionals and should include:

    1. Phase I Environmental Site Assessment (ESA)
      This preliminary evaluation reviews the site’s environmental history, previous land use, and any potential risks. While it doesn’t involve physical sampling, it highlights red flags that might require additional investigation.
    2. Phase II Environmental Site Assessment
      If Phase I raises concerns, Phase II involves detailed lab testing of soil, groundwater, building materials, and air to confirm the presence of hazards like asbestos, mold, or lead.
    3. Lead Testing
      Both X-ray fluorescence (XRF) testing and lab sampling may be used to detect lead in paint, pipes, and soil.
    4. Mold Inspection and Air Quality Testing
      By assessing humidity levels, hidden moisture damage, and air quality, mold inspectors can find mold growth that’s not always visible to the naked eye.
    5. Asbestos Survey
      A comprehensive asbestos inspection examines materials like drywall, insulation, and floor tiles for asbestos content. Samples may be taken for laboratory testing, particularly in older buildings.
    6. Radon Testing
      Radon levels are measured over a specified period to ensure they remain below the EPA’s action level of 4 pCi/L.
    7. Underground Storage Tank (UST) Testing
      For properties with storage tanks underground, testing for leakage or contamination around the tank is essential.

    Practical Advice for Buyers

    Navigating environmental testing can seem overwhelming, especially for first-time commercial buyers. Here are some tips to ease the process:

    1. Hire Qualified Professionals
      Always work with licensed environmental inspectors who are trained to identify and test for specific hazards. A reputable professional will provide detailed reports and remediation recommendations.
    2. Budget for Testing and Remediation
      While environmental testing adds upfront costs, it pales in comparison to the price of mitigation or legal liability down the line. Factor these costs into your purchase negotiations.
    3. Review Existing Environmental Reports
      Many sellers conduct limited environmental assessments to attract buyers. Carefully review these reports but conduct your own independent testing to verify their findings.
    4. Negotiate Repairs with the Seller
      If hazards are identified, you could potentially negotiate terms for the seller to perform remediation or reduce the purchase price, enabling you to address the issues post-sale.
    5. Ensure Proper Documentation
      Keep all testing results, permits, and compliance documents. These protect you during legal challenges and speed up processes like property resale.
    6. Plan for Periodic Testing and Maintenance
      Even after purchase, regular testing and maintenance should be part of your property management routine to prevent future risks.

    Partnering with Experts

    Environmental testing is not only wise—it’s necessary. By investing in comprehensive assessments, you ensure the safety, value, and regulatory compliance of your commercial property. At AccuGuard Environmental, we specialize in providing reliable, accurate testing services tailored to the needs of commercial real estate buyers. Our certified experts leverage cutting-edge technology to identify hazards and guide you through next steps, giving you confidence in your investment.

    Whether you’re in the preliminary stages or ready to close, contact us to discuss how we can assist with your environmental testing needs. Your due diligence today protects your success tomorrow.

  • How to Effectively Test for Lead in Fire-Damaged Buildings

    How to Effectively Test for Lead in Fire-Damaged Buildings

    Fire-damaged buildings present unique challenges when it comes to restoration and safety. One often overlooked, yet critical, concern is the presence of lead. Structures built before 1978 are particularly susceptible, as lead-based paint and other materials were widely used during this time. When these materials are exposed to extreme heat during a fire, they can release toxic lead particles into the air, soil, and surrounding surfaces. Understanding how to test for lead effectively in fire-damaged buildings is key to protecting health, ensuring safety, and meeting regulatory requirements.

    Why Testing for Lead is Essential in Fire-Damaged Structures

    After a fire, it’s tempting to focus solely on visible structural damage. However, the potential for lead contamination significantly raises the stakes for restorers and property owners alike. Here’s why lead testing should be a priority:

    1. Health Risks
      Exposure to lead is toxic, especially for children and pregnant women. It can cause neurological damage, learning disabilities, kidney issues, and developmental delays. Fire events are particularly hazardous because the elevated temperatures can volatilize lead, allowing it to be inhaled or deposited on surfaces where it can be ingested.
    2. Contamination Spread
      Lead dust and particles released during a fire can infiltrate areas beyond the immediate damage zone. This risk is especially high when firefighting efforts disperse debris or when damaged materials are moved during cleanup.
    3. Regulatory Compliance
      Federal and Oregon state laws require proper identification and handling of lead materials during restoration. OSHA, EPA, and HUD all have strict guidelines on lead testing, disposal, and abatement.

    Given these risks, testing for lead isn’t just a precaution—it’s a necessity for protecting health and ensuring compliance with industry standards.

    Tools and Techniques for Lead Testing

    Evaluating lead contamination after a fire requires specialized tools and methods to accurately identify the presence and concentration of lead in both materials and the surrounding environment. Below are the most commonly used techniques:

    1. X-Ray Fluorescence (XRF) Analyzer
      XRF devices are portable tools that provide immediate, non-destructive results. They are used to detect lead in building materials like paint, soil, and roofing. This makes them ideal for larger properties that require extensive testing.
    2. Laboratory Analysis
      For precise measurements, samples of debris, soil, paint, or air can be collected and sent to a laboratory certified by the EPA’s National Lead Laboratory Accreditation Program (NLLAP). Labs use techniques such as atomic absorption spectrometry, which provides detailed data on lead concentration.
    3. Dust Wipe Testing
      Dust samples are gathered using moistened wipes to assess contamination in specific areas, especially on horizontal surfaces like floors or window sills. These samples are then analyzed in a laboratory.
    4. Air Sampling
      Post-fire environments often have airborne particles that could contain lead. High-volume samplers and filters are used to collect air samples, which are tested in a lab for particulate lead levels.
    5. Paint Chip Sampling
      This method involves removing a portion of paint from an affected surface and sending it to a lab for examination. While it’s a destructive test, it’s sometimes the most reliable option for determining lead content in suspected areas.

    Steps to Testing Lead in Fire-Damaged Buildings

    To ensure accurate results and a safe environment during testing, restorers should follow these steps:

    1. Conduct a Visual Survey

    Begin with a thorough inspection of the property to identify areas where lead-based materials were likely present, such as old painted surfaces, pipes, or metal fixtures.

    2. Secure the Contaminated Area

    Reduce the risk of spreading hazardous particles by sealing off affected zones with protective barriers. Use equipment like HEPA filters to minimize airborne contaminants.

    3. Choose the Right Testing Method

    Select a testing technique based on the circumstances. XRF is often the fastest for initial assessments, while lab analysis is recommended for comprehensive data.

    4. Collect Samples Strategically

    If using lab testing, gather samples from multiple locations, including floors, walls, air, and soil around the building’s exterior. Be sure to wear appropriate personal protective equipment (PPE) during the process.

    5. Consult with Professionals

    Certified lead experts or environmental specialists should oversee the testing to ensure accuracy, adherence to regulations, and proper documentation. DIY testing kits may suffice in minor cases, but professional assessments are strongly recommended for fire-damaged sites.

    6. Analyze and Plan for Mitigation

    Once testing results are in, consult with abatement professionals to develop a mitigation plan. Depending on the severity, this may involve encapsulating lead materials, replacing contaminated surfaces, or other removal strategies.

    Best Practices for Accurate Lead Testing

    Testing fire-damaged buildings for lead requires precision and adherence to safety protocols. Here are some best practices to keep in mind:

    • Use Certified Professionals
      Hire inspectors who hold certifications like EPA’s Lead-Based Paint Inspector or Risk Assessor license.
    • Follow Industry Standards
      Ensure all tests align with OSHA, EPA, and HUD guidelines for lead management in fire-damaged structures.
    • Prioritize Safety
      Wear PPE such as respirators, gloves, and coveralls to prevent personal exposure when collecting samples.
    • Document Everything
      Maintain detailed records of your testing procedures and results. These may be necessary for regulatory compliance and insurance claims.
    • Re-Test After Cleanup
      Once abatement is complete, conduct follow-up testing to confirm contaminated materials were managed effectively.

    Partner with AccuGuard Environmental for Expert Testing and Guidance

    At AccuGuard Environmental, we understand the complexities of lead contamination in fire-damaged properties. With state-of-the-art equipment, certified expertise, and a commitment to safety, we provide accurate lead testing and remediation planning to help you restore properties with confidence.

    If you need professional lead testing services or have questions about managing fire-damaged buildings, reach out to AccuGuard Environmental today. Protect your property—and the people within it—by taking proactive steps against hidden lead hazards.